This tutorial will show you how to use Photoshop’s layer styles, a simple texture, and a couple of brush tips to create a quick, vibrant bloody text effect.
Tutorial Assets
1-
Shlop Regular font.
2-
4 HD Flesh Textures by ThatSavior.
3-
Choc68 by jojo22.
4- PS Patterns –
Of all things fleshy by halmtier.
5-
Ink drops by darkdana666.
6- You’ll also need to load a default Photoshop Contours set. So go to Edit > Presets > Preset Manager, and choose Contours from the Preset Type drop down menu. Then click the little arrow to the right of the Preset Type drop-down menu, and click Contours near the bottom of the pop-up menu. When the dialog box appears after that, just click Append, and you’ll get the Contours set.
Step 1
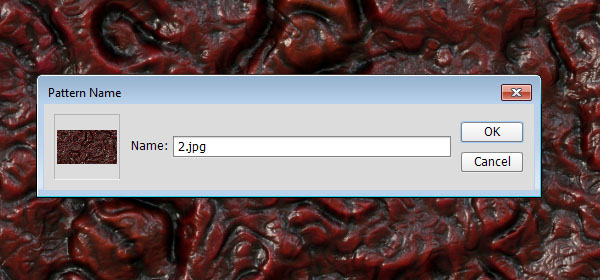
Open image 2 from the 4 HD Flesh Textures images, then go to Edit > Define Pattern, and click OK.
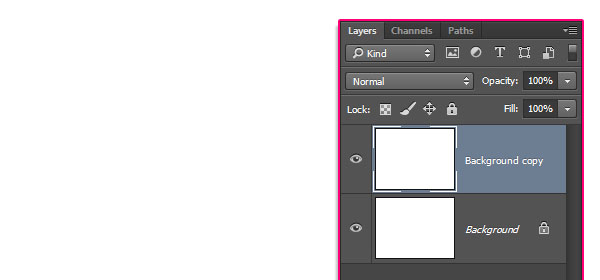
Create a new 850 x 650 px document, and duplicate the Background layer.
Double click the Background copy layer to apply a Gradient Overlay effect using the following settings:
Style: Radial
Scale: 150%
Click the Gradient box to create the gradient using the colors # 3b0707 to the left and # 020d17 to the right.
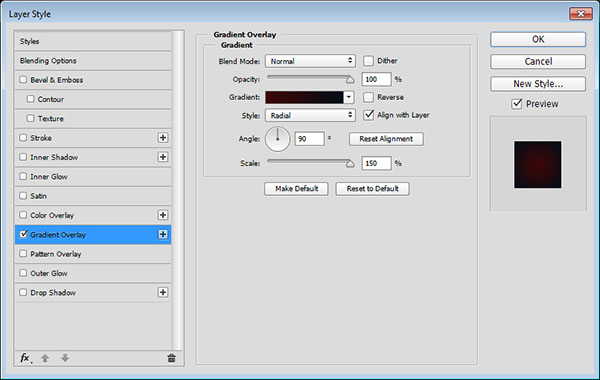
This will create the background gradient.

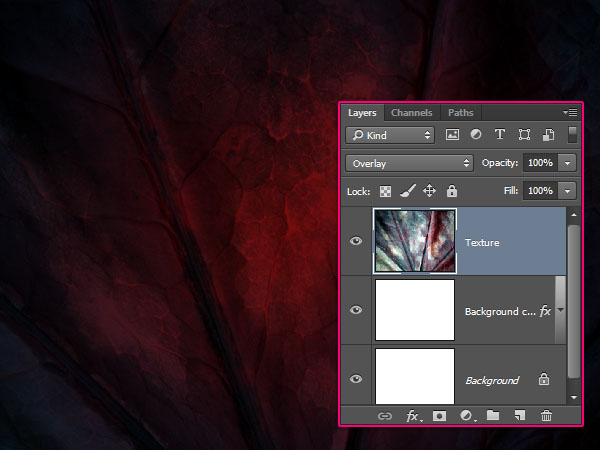
Place the Choc68 image on top of the Background copy layer, resize it as needed, then change its layer’s Blend Mode to Overlay.
 Step 2
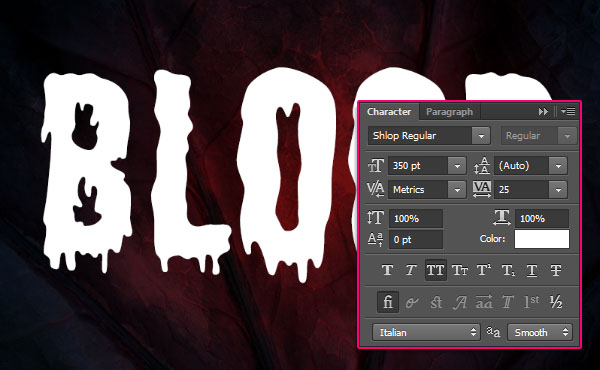
Create the text using the font Shlop Regular. The Size is 350 pt, and the Tracking value is 25
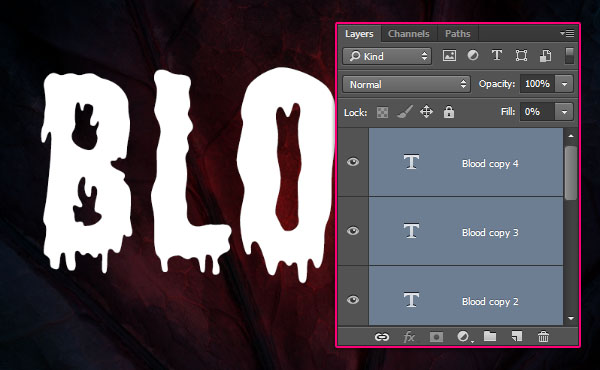
Duplicate the text layer 4 more times, and change the last three copy layers’ Fill value to 0.
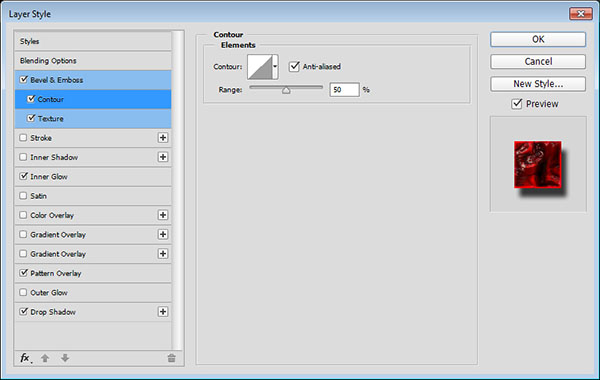
 Step 3
Double click the original text layer to apply the following layer style:
- Bevel and Emboss
Style: Stroke Emboss
Size: 9
Uncheck the Use Global Light box
Angle: -60
Altitude: 42
Gloss Contour: Ring – Double
Check the Anti-aliased box
Highlight Mode: Vivid Light
Color: #ffeeea
Shadow Mode – Opacity: 50%
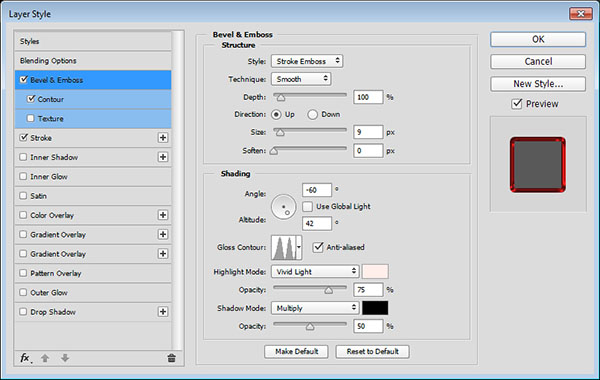
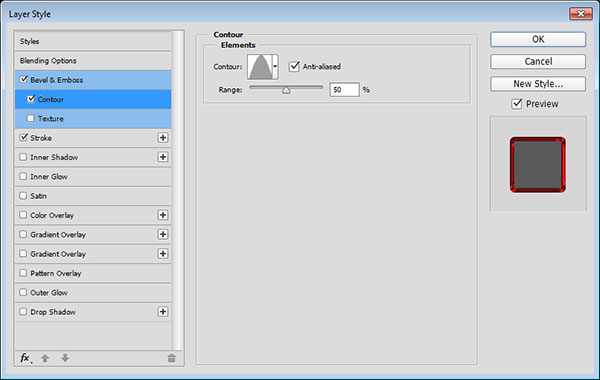
- Contour
Contour: Cone
Check the Anti-aliased box.
- Stroke
Size: 6
Color: #901414
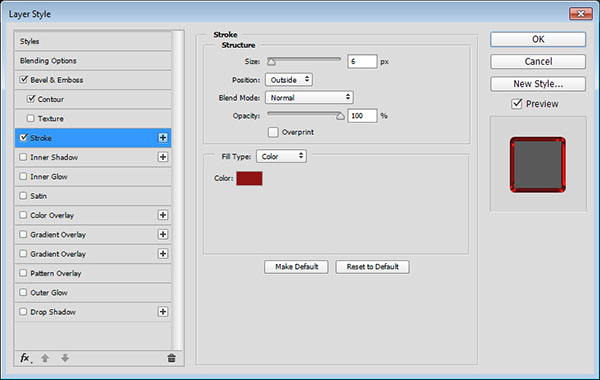
This will create the stroke.
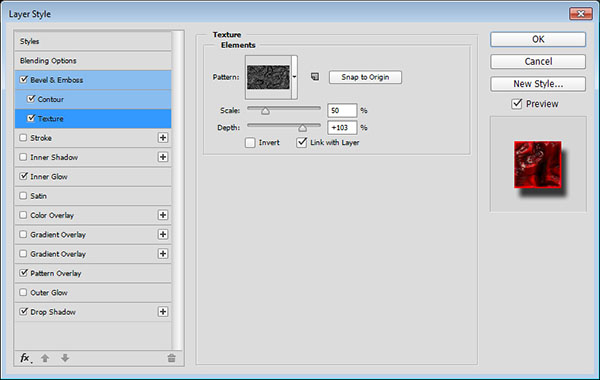
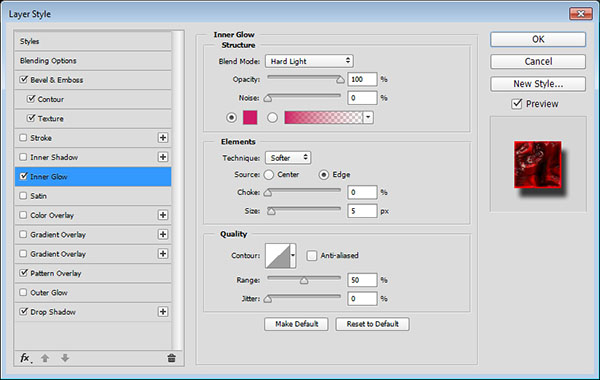
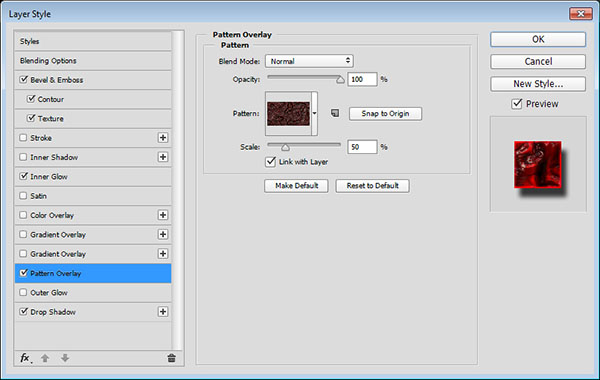
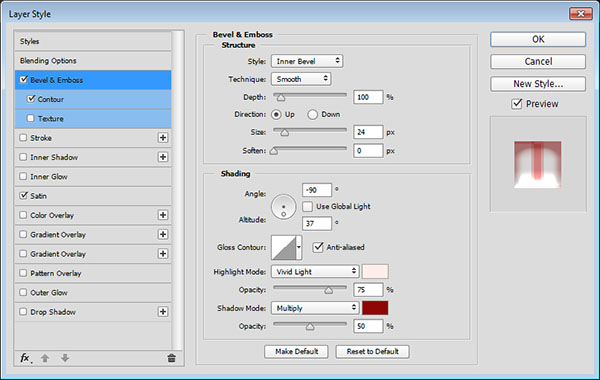
Step 4
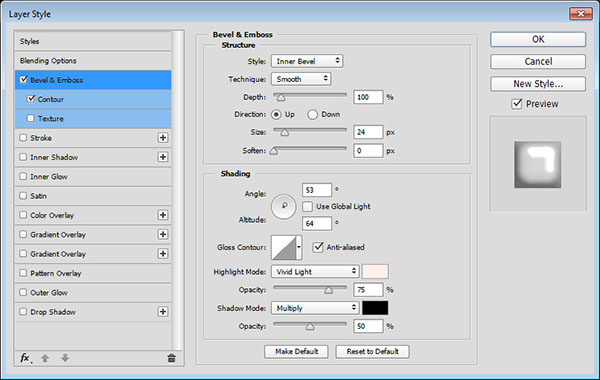
Double click the first copy text layer to apply the following layer style:
- Bevel and Emboss
Size: 35
Gloss Contour: Cone – Inverted
Check the Anti-aliased box
Highlight Mode: Vivid Light
Color: #ff6969
Opacity: 50%
Shadow Mode: Color Burn
Color: #ff1717
Opacity: 50%
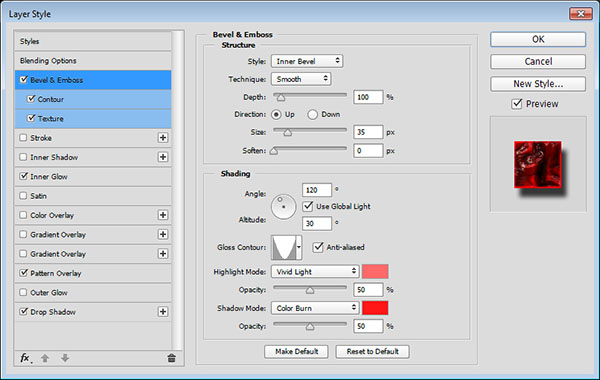
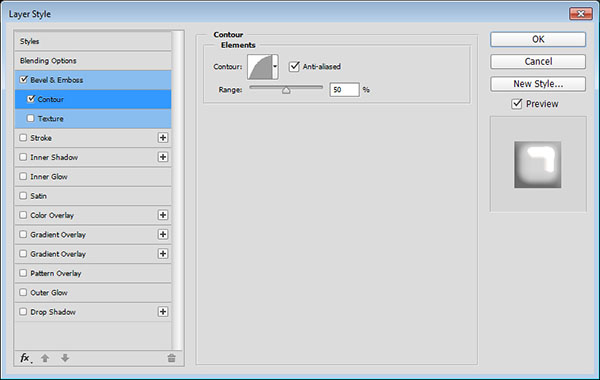
- Contour
Check the Anti-aliased box.
- Texture
Pattern: 2.jpg
Scale: 50%
Depth: 103%
- Inner Glow
Blend Mode: Hard Light
Opacity: 100%
Color: #cf1c68
- Pattern Overlay
Pattern: 2.jpg
Scale: 50%
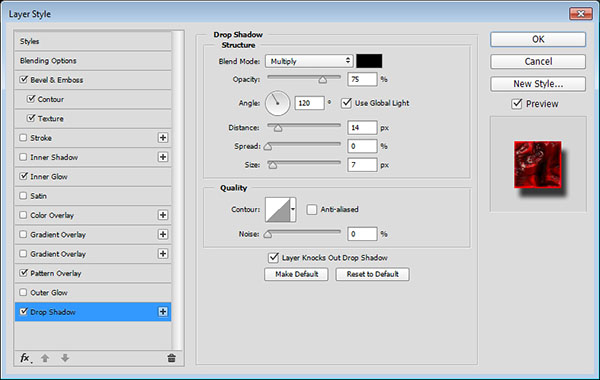
- Drop Shadow
Distance: 14
Size: 7
This will create the main textured effect.
 Step 5
Double click the second copy text layer to apply the following layer style:
- Bevel and Emboss
Size: 24
Uncheck the Use Global Light box
Angle: 53
Altitude: 64
Check the Anti-aliased box
Highlight Mode: Vivid Light
Color: # ffeeea
Opacity: 75%
Shadow Mode – Opacity: 50%
- Contour
Contour: Half Round
Check the Anti-aliased box
This will add some highlights.
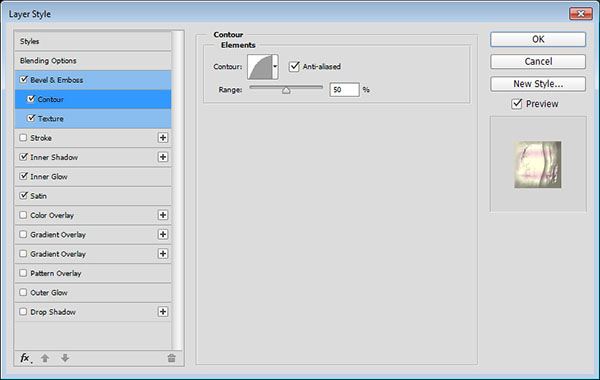
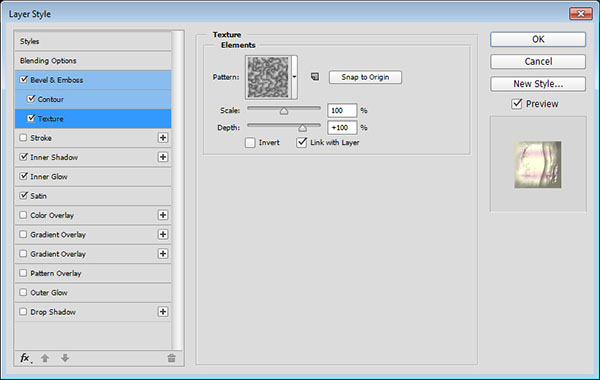
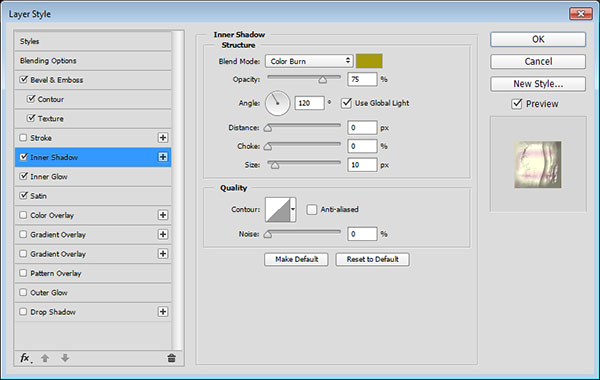
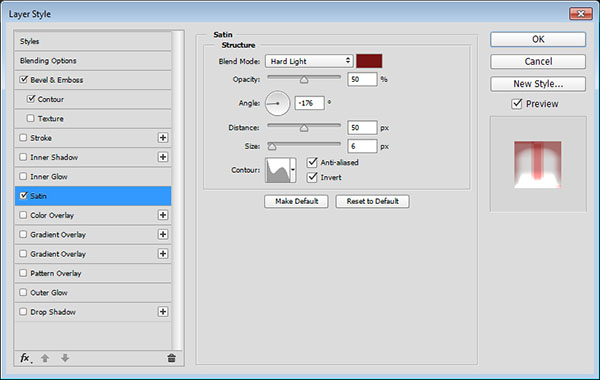
 Step 6
Double click the third copy text layer to apply the following layer style:
- Bevel and Emboss
Size: 24
Uncheck the Use Global Light box
Angle: 158
Altitude: 64
Check the Anti-aliased box
Highlight Mode:
Color: # ffaaaa
Opacity: 50%
Shadow Mode – Opacity: 50%
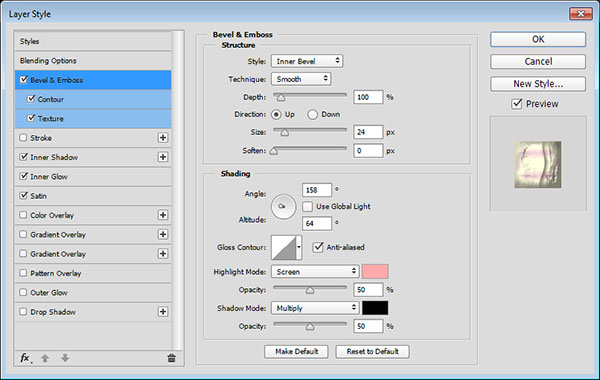
- Contour
Contour: Half Round
Check the Anti-aliased box.
- Texture
Pattern: 9.jpg (from the PS Patterns – Of all things fleshy pack)
- Inner Shadow
Blend Mode: Color Burn
Color: #a79a0c
Distance: 0
Size: 10
- Inner Glow
Blend Mode: Overlay
Opacity: 100%
Color: #dc3141
Technique: Precise
Source: Center
Size: 81
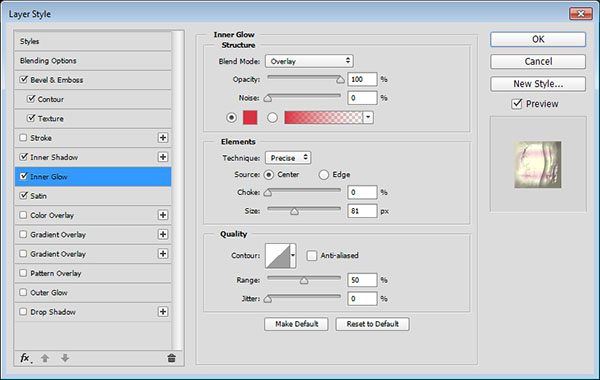
- Satin
Blend Mode: Color Dodge
Color: #e8bf41
Opacity: 36%
Angle: -76
Distance: 56
Size: 40
Contour: Cone – Inverted
Check the Anti-aliased box
Check the Invert box.
This will add more depth and detailing to the text.
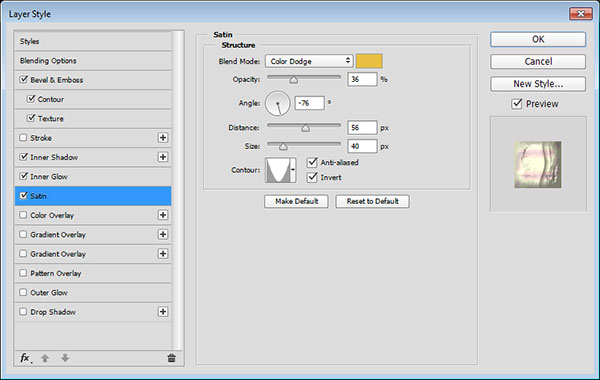
 Step 7
Double click the fourth copy text layer to apply the following layer style:
- Bevel and Emboss
Size: 24
Uncheck the Use Global Light box
Angle: -90
Altitude: 37
Check the Anti-aliased box
Highlight Mode: Vivid Light
Color: #ffeeea
Opacity: 50%
Shadow Mode:
Color: #8f0606
Opacity: 50%
- Contour
Contour: Half Round
Check the Anti-aliased box.

- Satin
Blend Mode: Hard Light
Color: #791414
Opacity: 50%
Angle: -176
Distance: 50
Size: 6
Contour: Rolling Slope – Descending
Check the Anti-aliased box
Check the Invert box.
This will finalize the text effect with even more detailing and a liquid-like look.
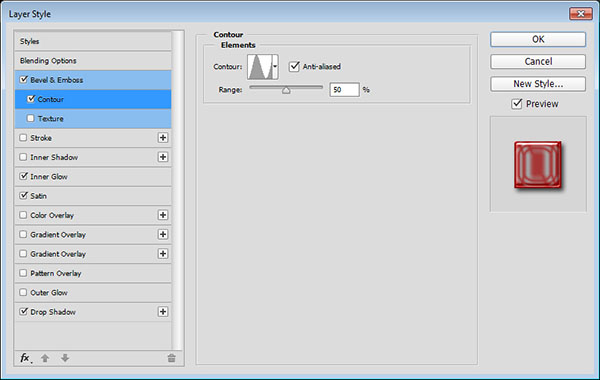
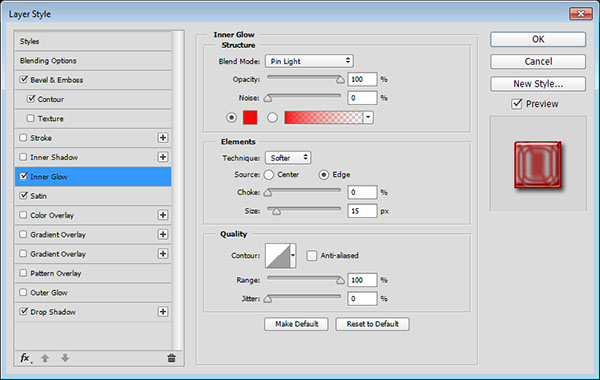
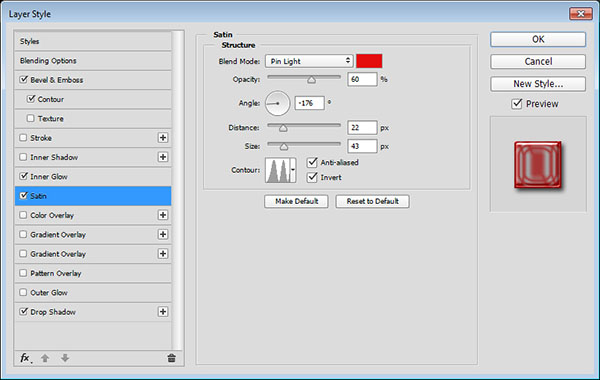
 Step 8
Create a new layer on top of all layers and call it Splash, then change its Fill value to 0.
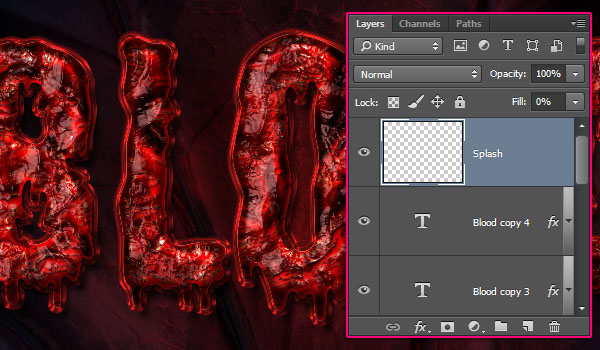
Double click the Splash layer to apply the following layer style:
- Bevel and Emboss
Gloss Contour: Cove – Deep
Check the Anti-aliased box
Highlight Mode: Linear Light
Color: #ffd6d6
Opacity: 73%
Shadow Mode: Linear Burn
Opacity: 70%
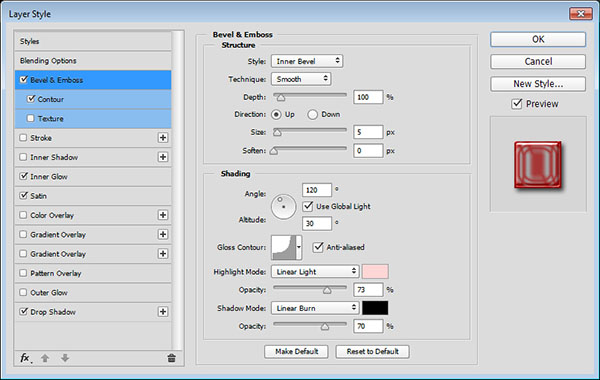
- Contour
Contour: Ring
Check the Anti-aliased box.
- Inner Glow
Blend Mode: Pin Light
Opacity: 100%
Color: #f10d0d
Size: 15
- Satin
Blend Mode: Pin Light
Color: #e40e0e
Opacity: 60%
Angle: -176
Distance: 22
Size: 43
Contour: Ring – Double
Check the Anti-aliased box
Check the Invert box.
- Drop Shadow
Size: 7
Next, you’ll need to pick a couple of the Ink drops set’s brush tips, resize them as you like, and add them on top of the text.
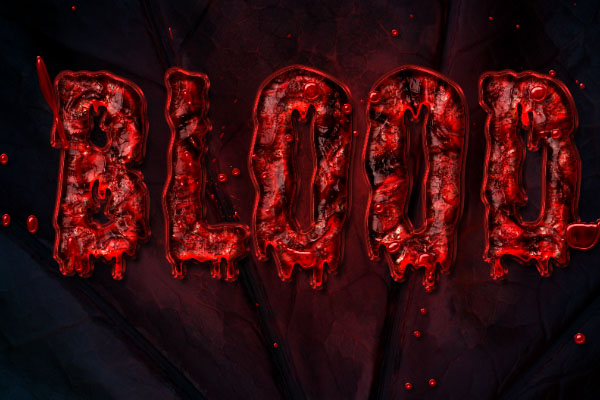
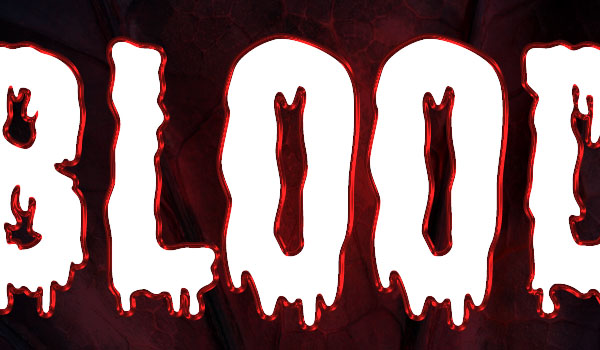
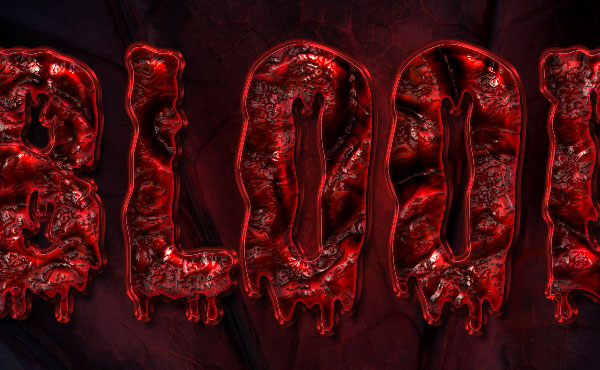
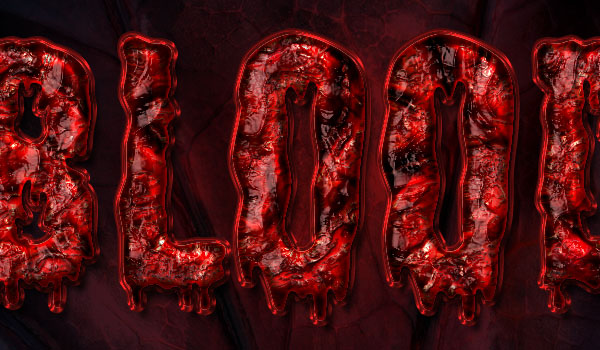
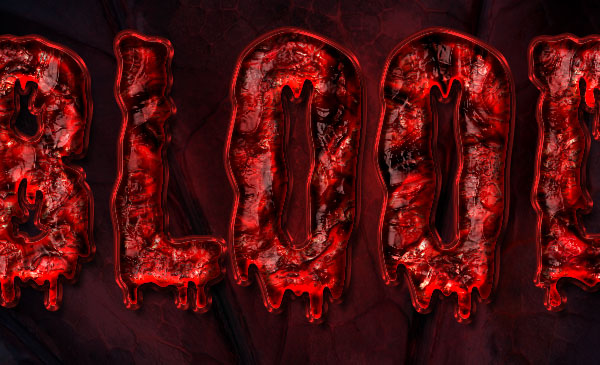
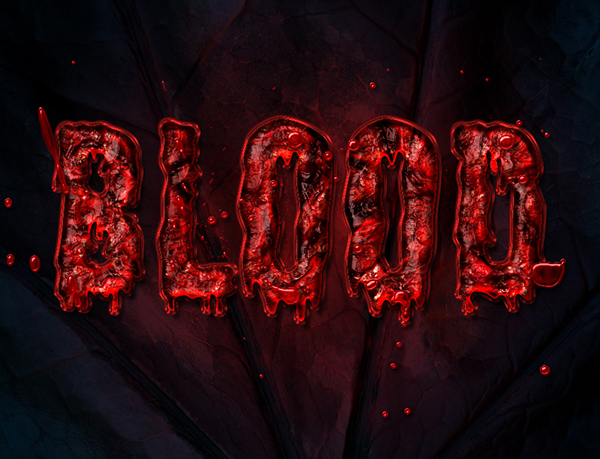
And you’re done!
Conclusion
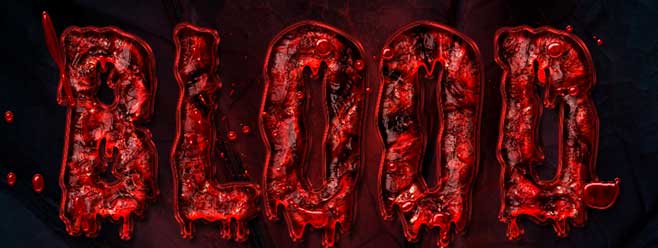
This is the final result. Using textures and layer styles is an effective way of creating vivid and detailed effects.
Hope you enjoyed the tutorial and found it helpful.
أجمل تحياتى


 منذ /16-12-2015, 09:59 PM


 المواضيع المتشابهه


 العرض الشجري