|
|||||||


| منتدى دروس الفوتوشوب هنا كل ما يخص البرنامج الرائع الفوتوشوب من [شرح ودروس]... |
 |
|
|
أدوات الموضوع | انواع عرض الموضوع |
|
|||||||
| منتدى دروس الفوتوشوب هنا كل ما يخص البرنامج الرائع الفوتوشوب من [شرح ودروس]... |
|
|
|
أدوات الموضوع | انواع عرض الموضوع |
 منذ /11-01-2016, 09:31 PM
|
#1 | |||||
|
:: مراقب :: 
|
|
|||||

|
|
منذ /20-05-2016, 11:17 PM
|
#2 | |||||
|
:: عضو جديد :: 
|
شكرا ليك اخي على هذا الموضوع المميز |
|||||
|
|
|
منذ /21-06-2022, 03:56 PM
|
#3 | |||||
|
مخالف
|
شكرا جزيلا |
|||||
|
|
|
منذ /02-07-2022, 02:10 PM
|
#4 | |||||
|
مخالف
|
شكرا علي المعلومات |
|||||
|
|
|
منذ /06-07-2022, 01:56 PM
|
#5 | |||||
|
:: عضو جديد ::
|
شكرا |
|||||
|
|
|
منذ /28-11-2023, 11:06 AM
|
#6 | |||||
|
:: عضو محترف ::
|
Thank you |
|||||
|
|
|
منذ /30-11-2023, 07:39 PM
|
#7 | |||||
|
:: عضو خبير ::
|
شكر جدا لك |
|||||
|
|
|
منذ /08-06-2024, 04:12 AM
|
#8 | |||||
|
:: عضو مميز ::
|
بارك الله فيك أخي الكريم على هذا العمل الرائع |
|||||
|
|
|
منذ /30-05-2025, 05:44 PM
|
#9 | |||||
|
:: عضو شرف المنتدى :: 
|
مرحبا بكم نورتوا مواضيعى |
|||||
|
|
|
| مواقع النشر (المفضلة) |
| الكلمات الدلالية (Tags) |
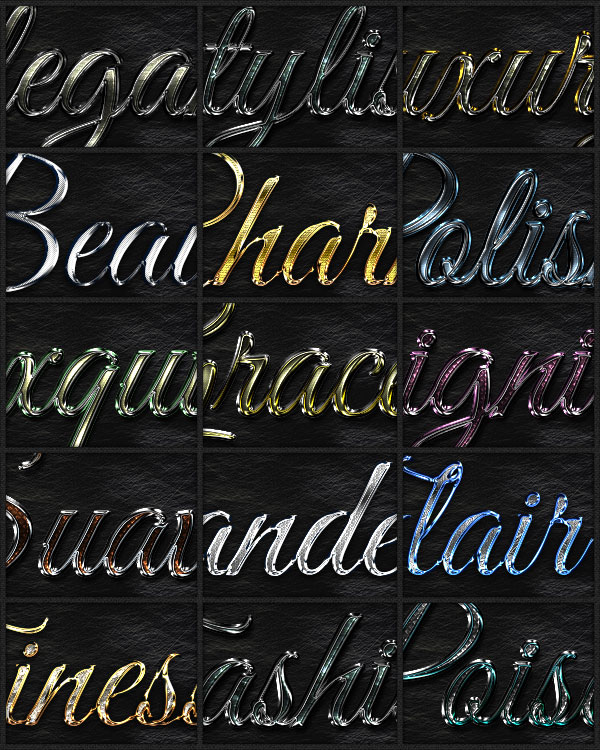
| النص, تأثير, بالفوتوشوب, فاخر |
|
|
 المواضيع المتشابهه
|
||||
| الموضوع | كاتب الموضوع | المنتدى | مشاركات | آخر مشاركة |
| درس أضافة تأثير لامع نظيف على النص البلاسنيك بالفوتوشوب | ayman | منتدى دروس الفوتوشوب | 3 | 26-05-2022 08:43 PM |
| شرح طريقة عمل تأثير الشبح على النص بالفوتوشوب | maher | منتدى دروس الفوتوشوب | 0 | 23-01-2012 07:31 PM |
| درس تأثير الإحتفال على النص | hesham234 | منتدى دروس الفوتوشوب | 0 | 26-06-2011 07:48 PM |
| درس عمل تأثير الكروم على النص | aymano | منتدى دروس الفوتوشوب | 1 | 01-11-2009 04:51 PM |
| درس تأثير على النص | aymano | منتدى دروس الفوتوشوب | 0 | 23-07-2009 10:33 PM |


 Step 5
 Step 6
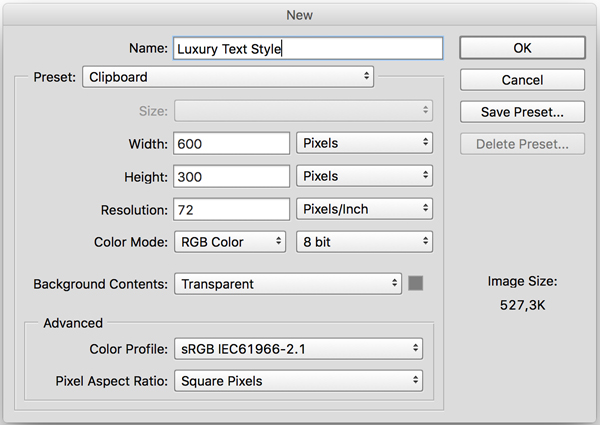
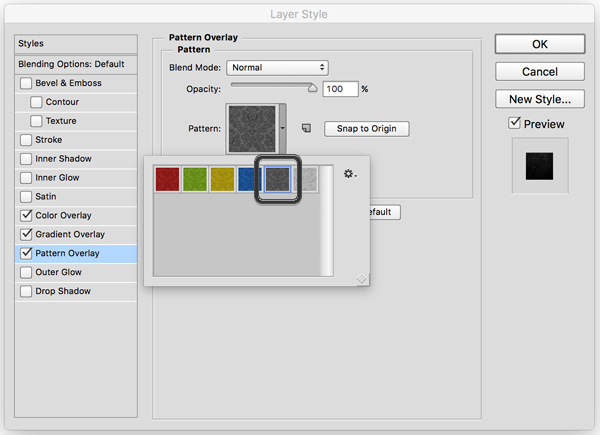
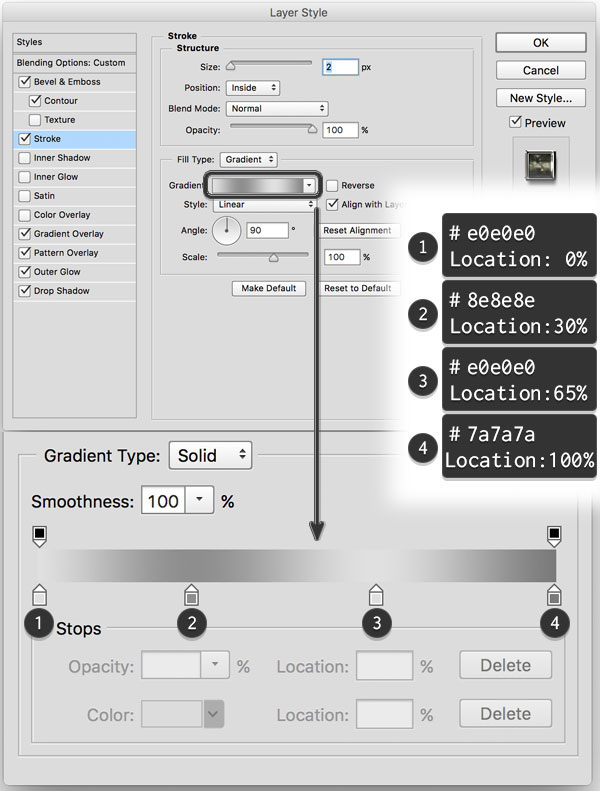
 2. Create the Text and Add Effects
 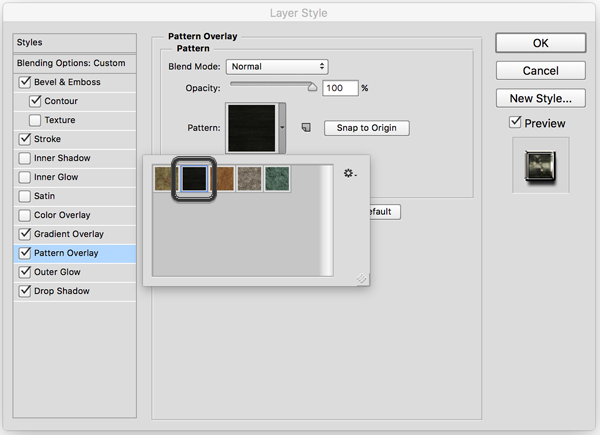 Step 4
 Step 5
 Step 6
 Step 7
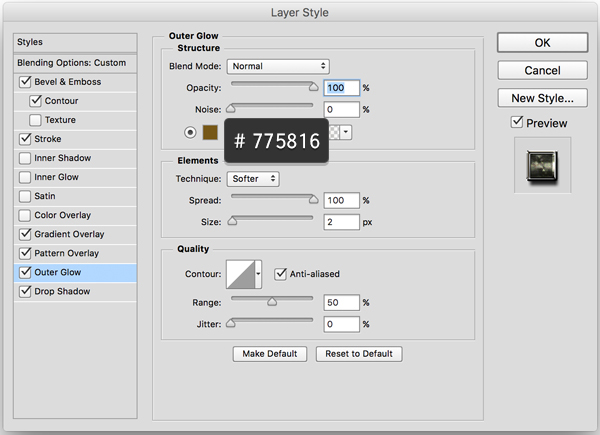
 Step 9
 Step 10
 Step 2


 العرض العادي

